Setting up your TicketSocket system to track dynamic conversions and real time revenue tracking can sound complex but we’ve got your back. Simply follow this step by step visual guide and we’ll get you tracking your real-time revenue and conversions in no time.
Step 1: Google Analytics Setup and Administration.
In order to track website traffic you should already have a Google Analytics account setup for your main website such as a www.yourcompany.com.
If you don’t already have one, not to worry. Simply go to Go to Google Analytics Home page and sign into your google account: https://analytics.google.com/analytics
Setting your account up is simple, the setup process should look something like this:

If you already have a Google Analytics account setup like most companies, even better.
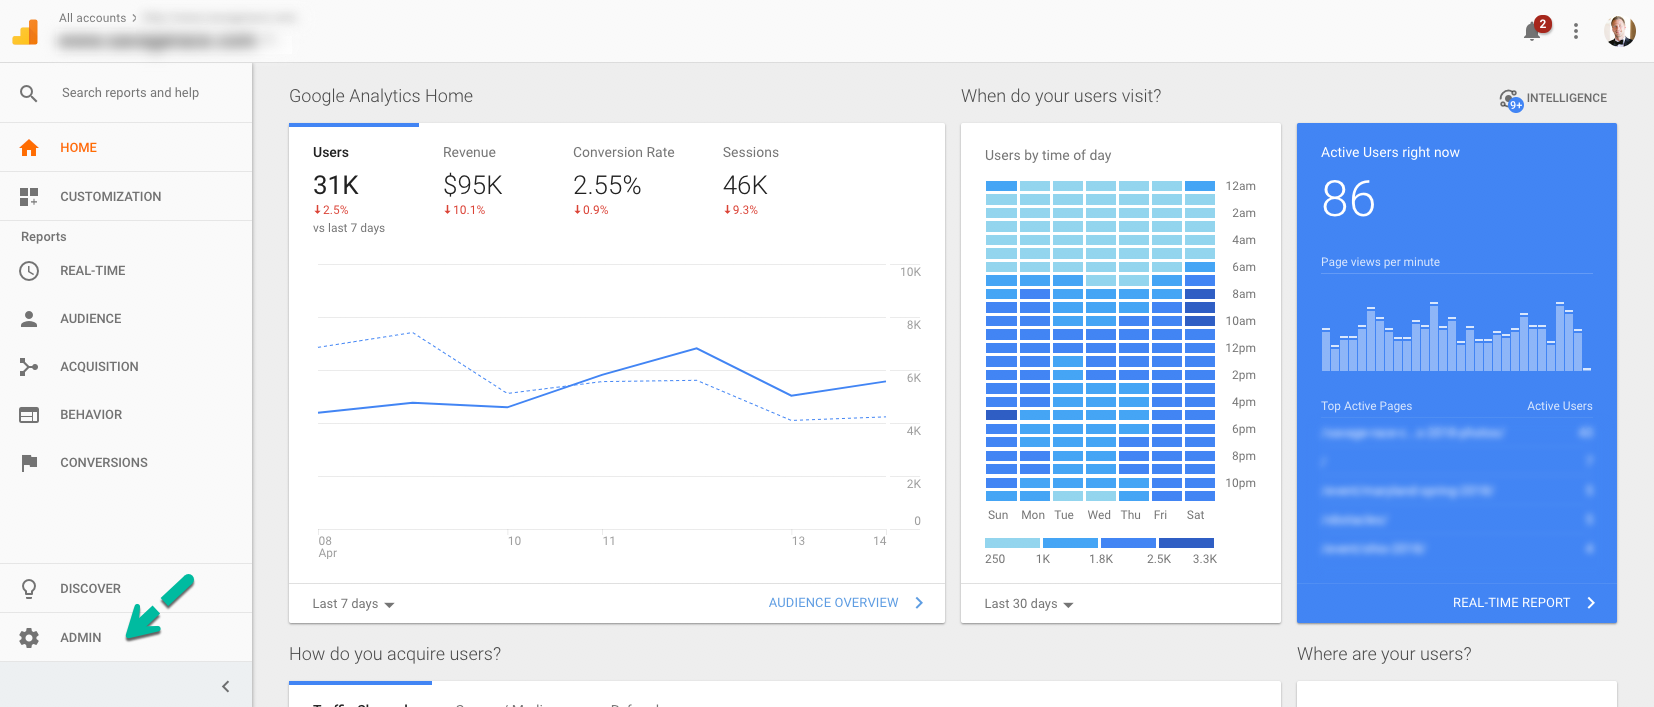
Simply click “ADMIN” at the bottom of your Analytics dashboard.
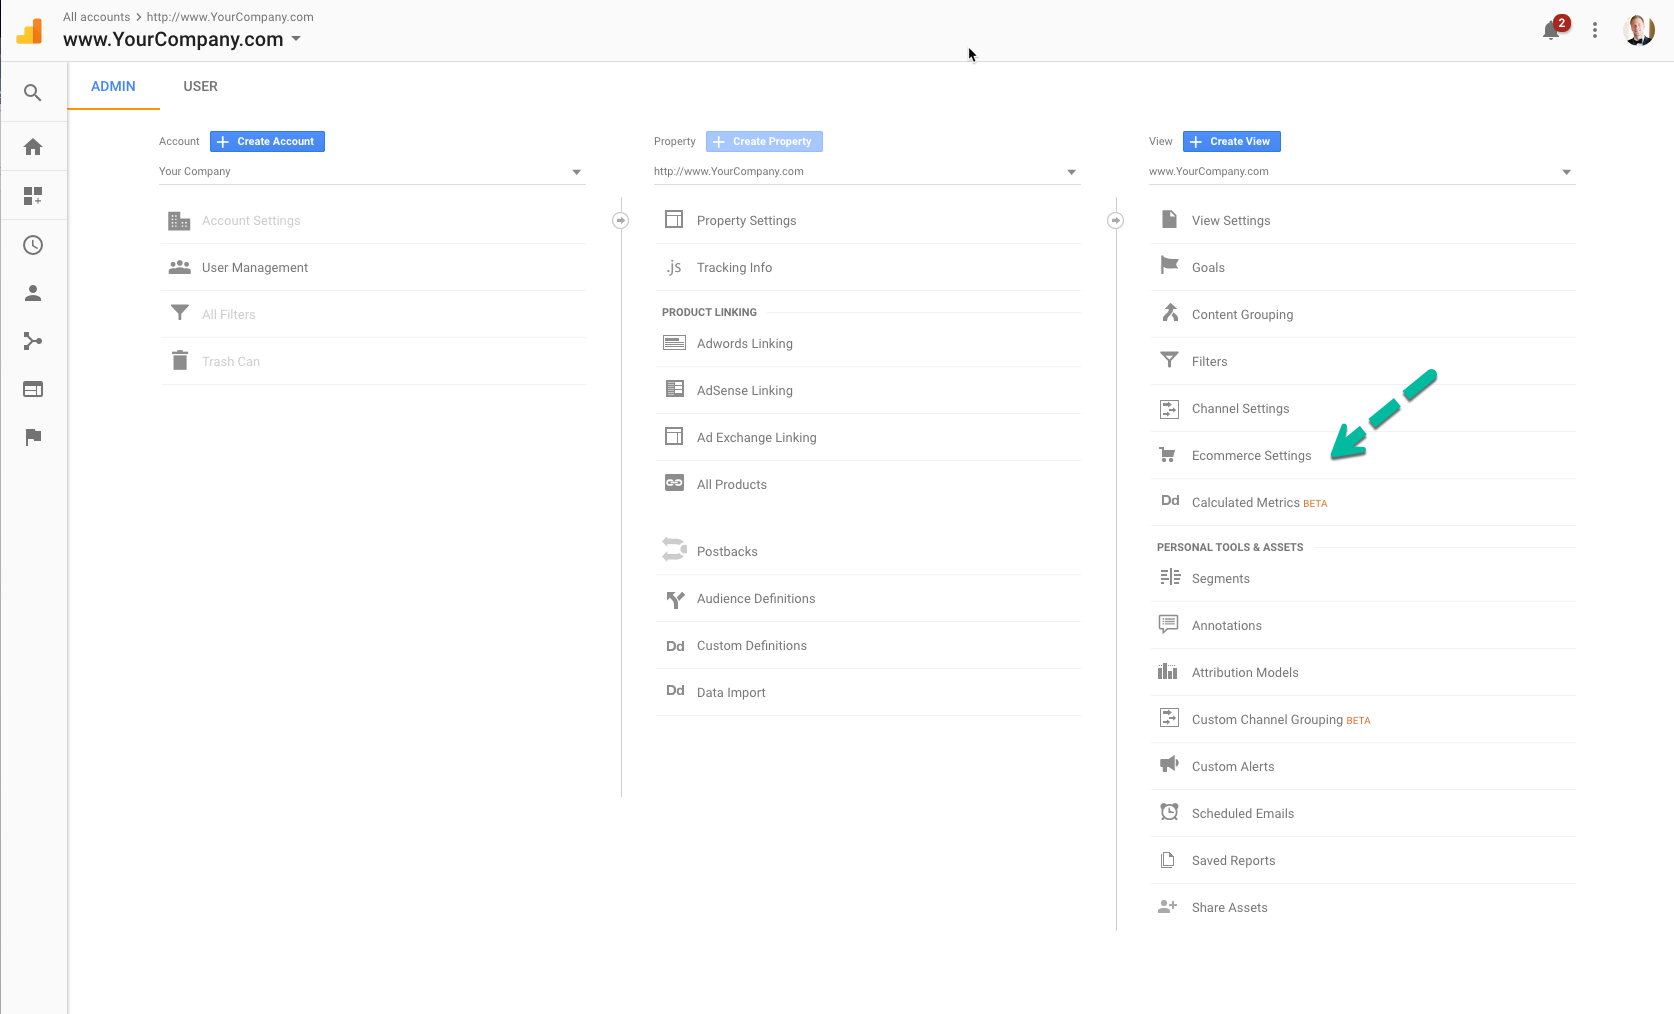
Next once on your Admin Analytics page, simply click “Ecommerce Settings”
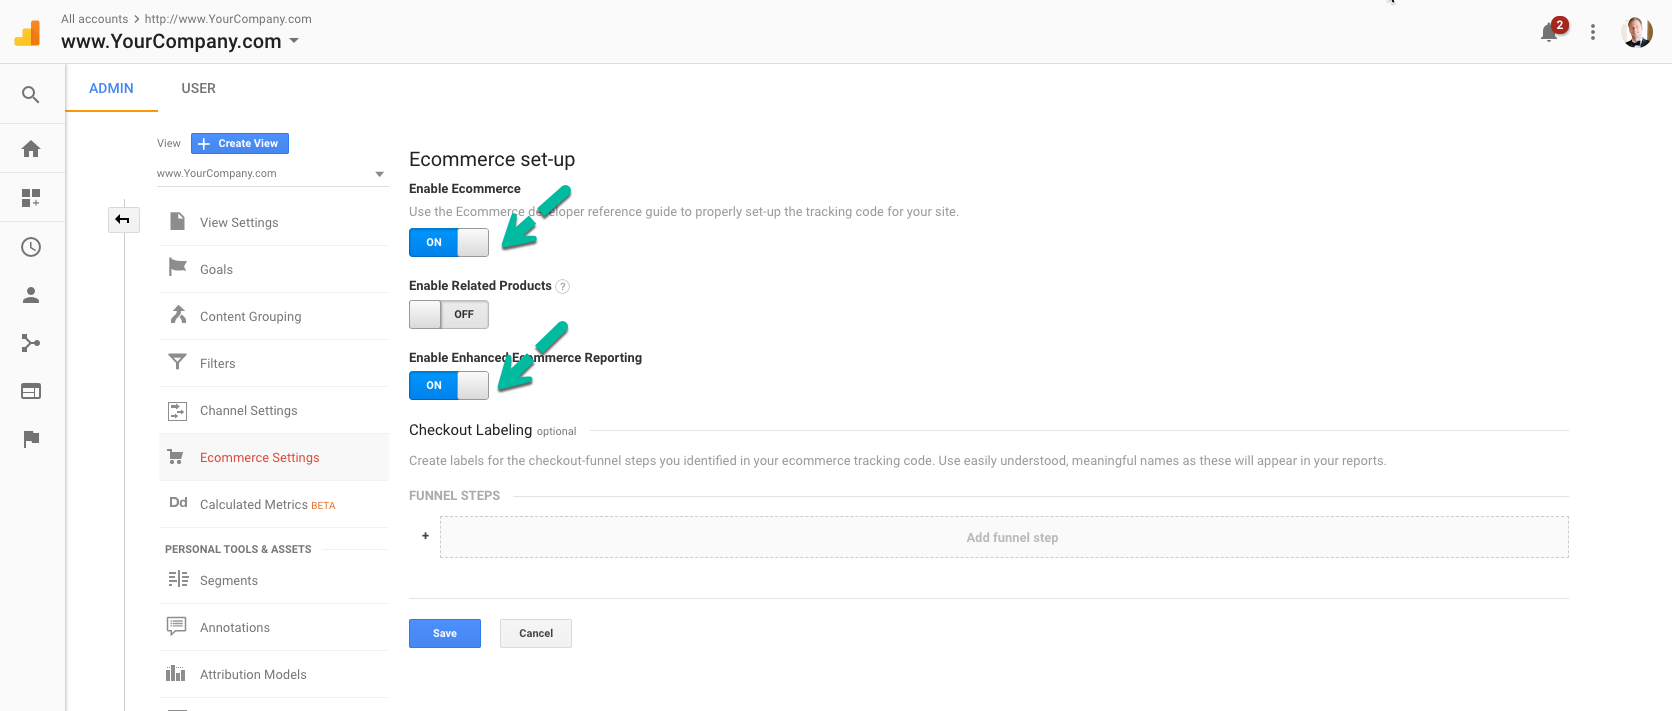
Turn on “Enable Ecommerce” and “Enable Enhanced Ecommerce Reporting” toggles.
Step 2: Google Tag Manager Setup and Administration.
In order to track conversions and revenue you should already have a Google Tag Manager account setup for your main website such as a www.yourcompany.com.
If you don’t already have one, not to worry. Simply go to Go to Google Tag Manager Home page and sign into your google account.
Go to Google Tag Manager here and login: https://www.google.com/analytics/tag-manager/
Click Sign In and go through the Setup Account and Setup your new Container.
Step 2a: Setup your Trigger
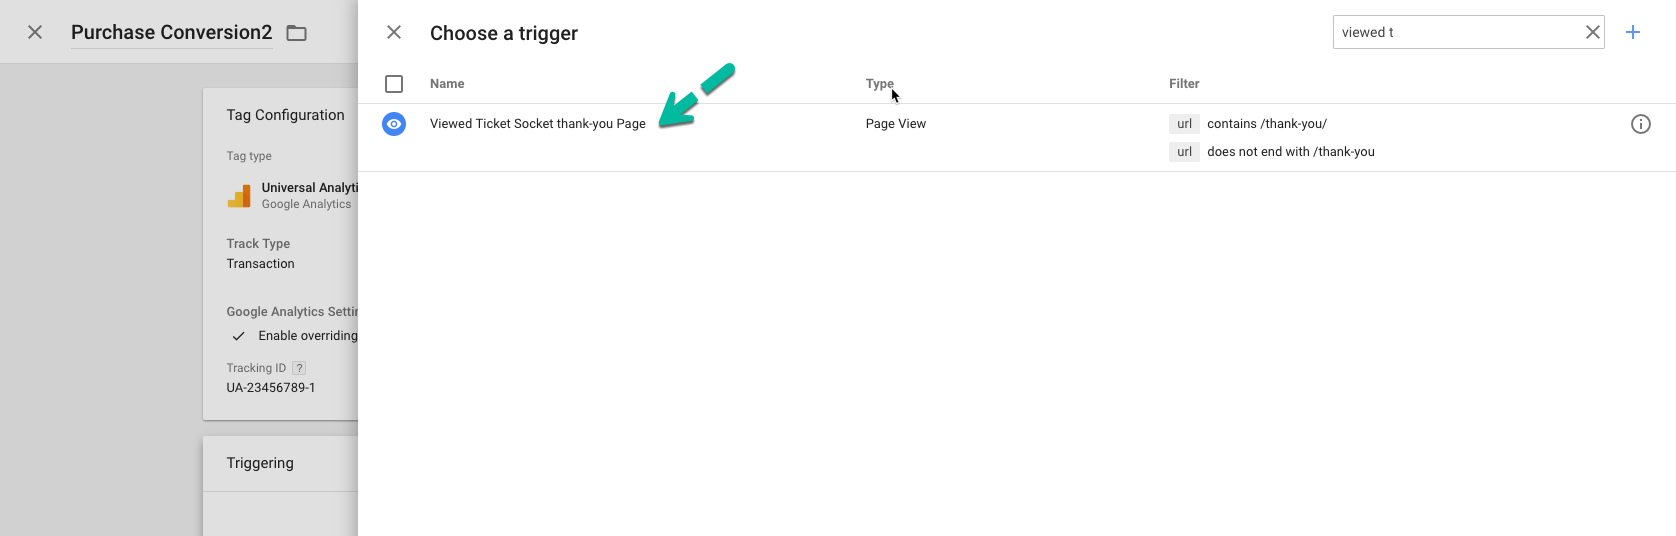
First you must setup the action that you want to trigger the conversion to be recognized. To do this first go to “Triggers” and click “NEW”. Name this “Viewed TicketSocket Thank-You Page”.
Next select Trigger Type “Page View” and select This Trigger fires on “Some Page View”.
In order for your conversion to fire on the dynamic thank-you TicketSocket confirmation page you must configure the URL conditions as shown below:

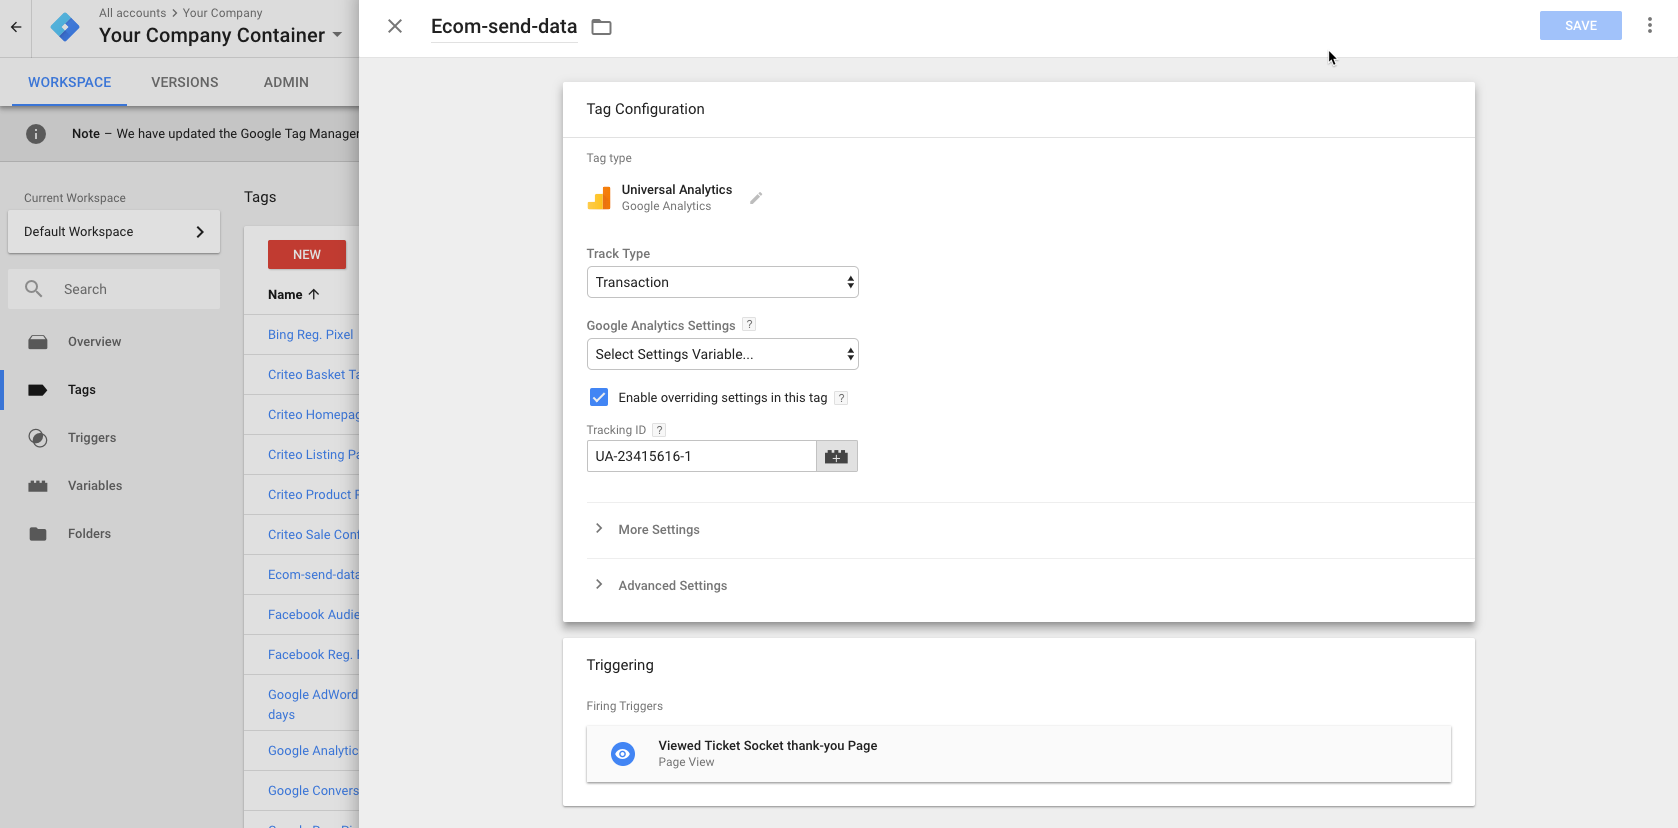
Step 2b: Setup your Purchase Conversion Tag
Now that you have your trigger, you must setup the tag that you will use. Simply go to Tags and click “New Tag”.
Name this “Purchase Conversion” and select “Universal Analytics” as the Tag Type.
Next select “Transaction” as the Track Type and check the “Enable Overriding settings in this tag” box. This will prompt you to enter your Google Analytics Tracking ID such as UA-234567-1.
Then select “Trigger” and select the trigger you created named “View TicketSocket Thank-You Page”.
When complete simply click “Save” in the top right corner. Once you are done it should look like this:
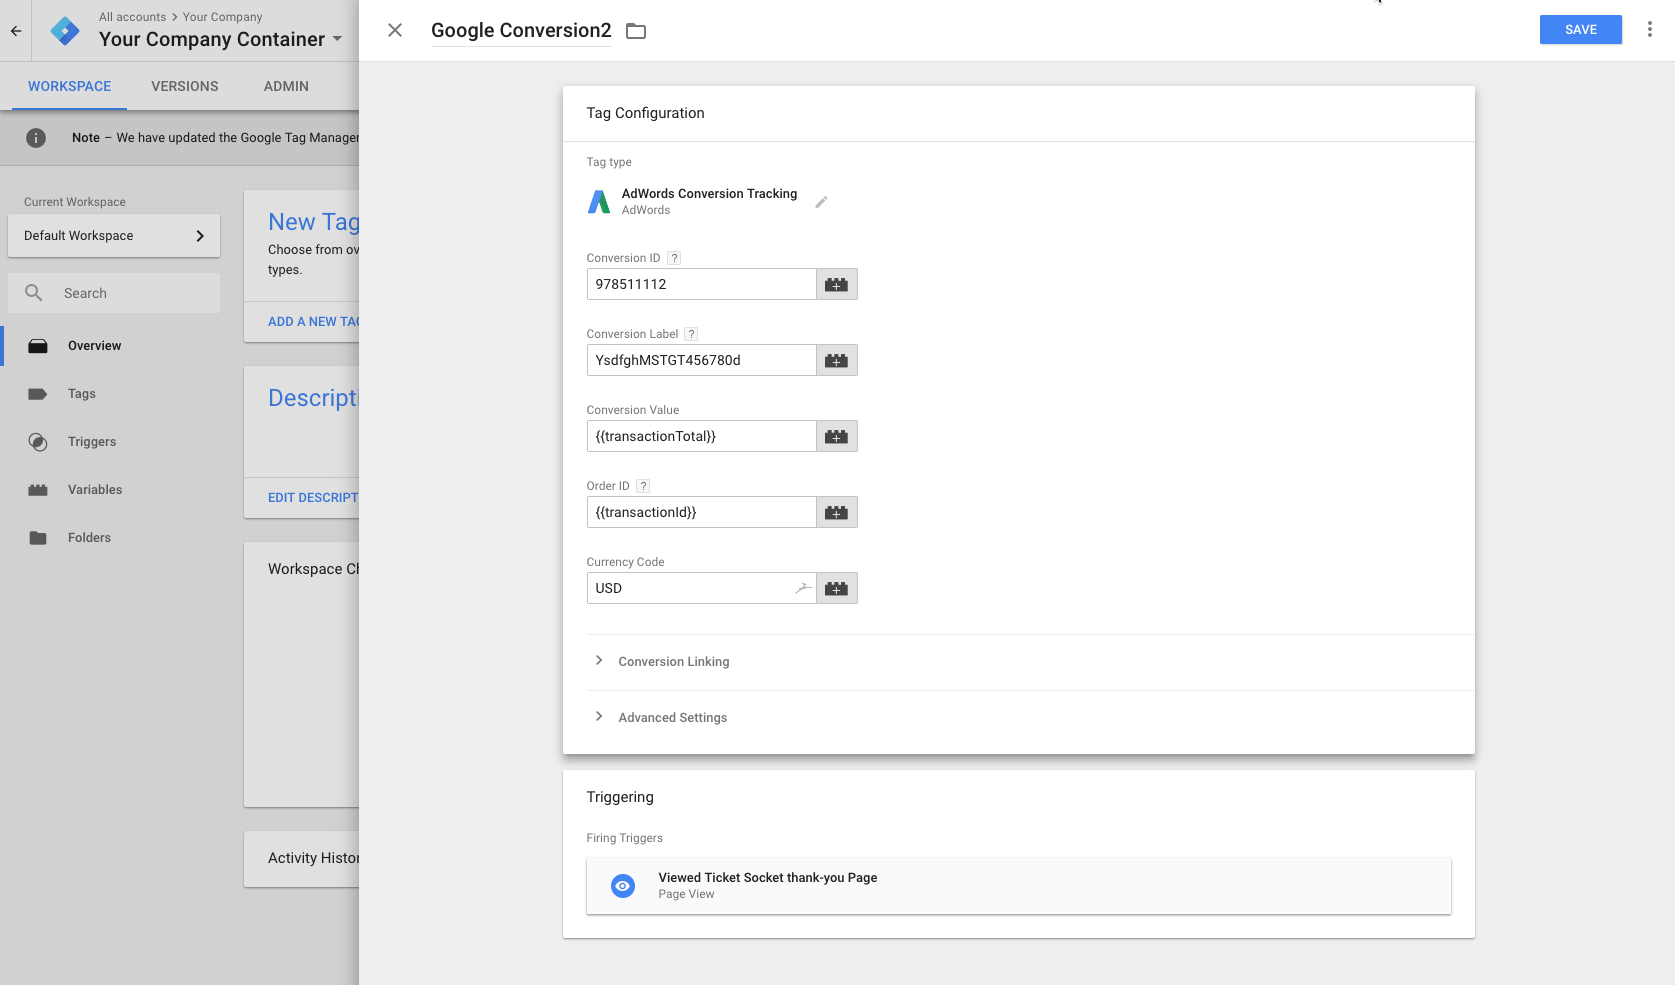
Step 2c: Setup your Google Conversion Tag (For real-time revenue reporting and tracking)
Now that you have your Purchase Conversion Tag, you must setup the Google Conversion Tag that you will use. Simply go to Tags and click “New Tag” as you did before. You will need your Google AdWords account information in order to configure real time revenue tracking
Name this “Google Conversion” and select “AdWords Conversion Tracking” as the Tag Type.
Next select enter your Google AdWords Conversion ID and Conversion Label which you can obtain from your Google AdWords account campaign. If you don’t have this yet, simply go to Google AdWords.com and set this up. https://adwords.google.com/home .
Next simply enter the following into your “Conversion Value” and “Order ID” and Currency Code fields:
Conversion Value: {{transactionTotal}}
Order ID: {{transactionId}}
Currency Code: USD
Then select “Trigger” and select the trigger you created named “View TicketSocket Thank-You Page” When complete simply click “Save” in the top right corner.
Once you are done it should look like this:
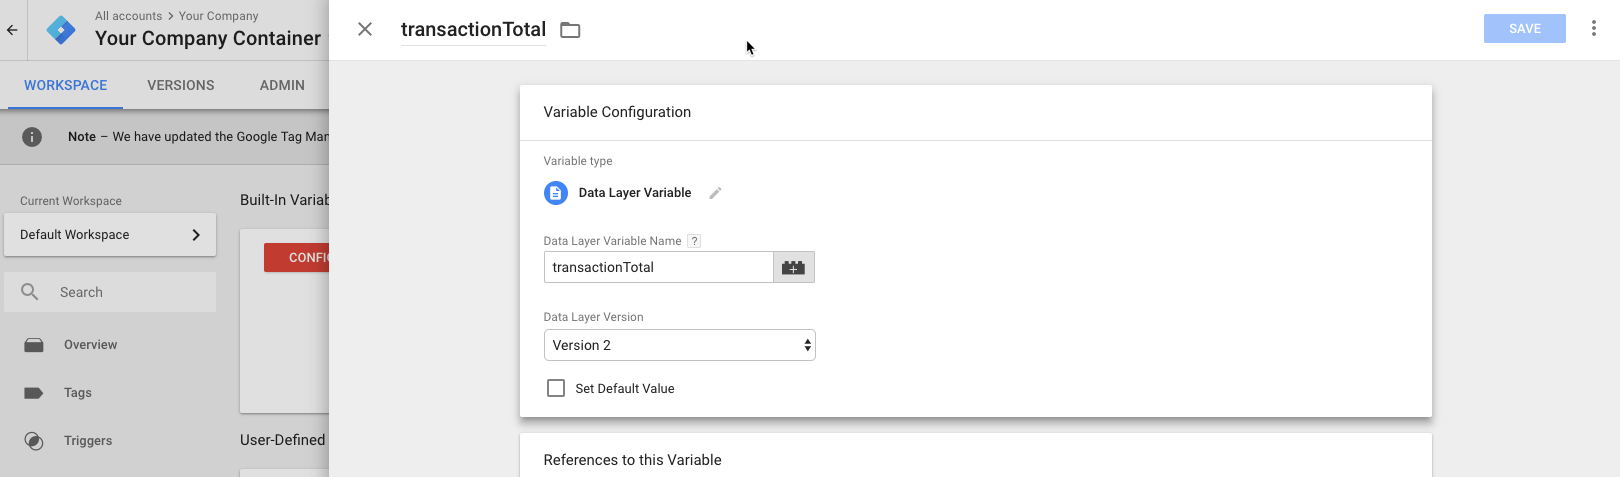
Step 3: Create your Variables
Now that you have your Tags and Triggers, you must setup the your Variables.
Simply go to “Variables” and click “New”
You must crate two Variables that you previously referenced in your “Google Conversion” Tag.
1. Once clicking “New” name the first variable “transactionID” and select variable Type “Data Layer Variable”
Then simply enter “transactionID” and select Data Later Version “Version 2”.

2. Now click “New” name the second variable “transactionTotal” and select variable Type “Data Layer Variable”
Then simply enter “transactionID” and select Data Later Version “Version 2”.
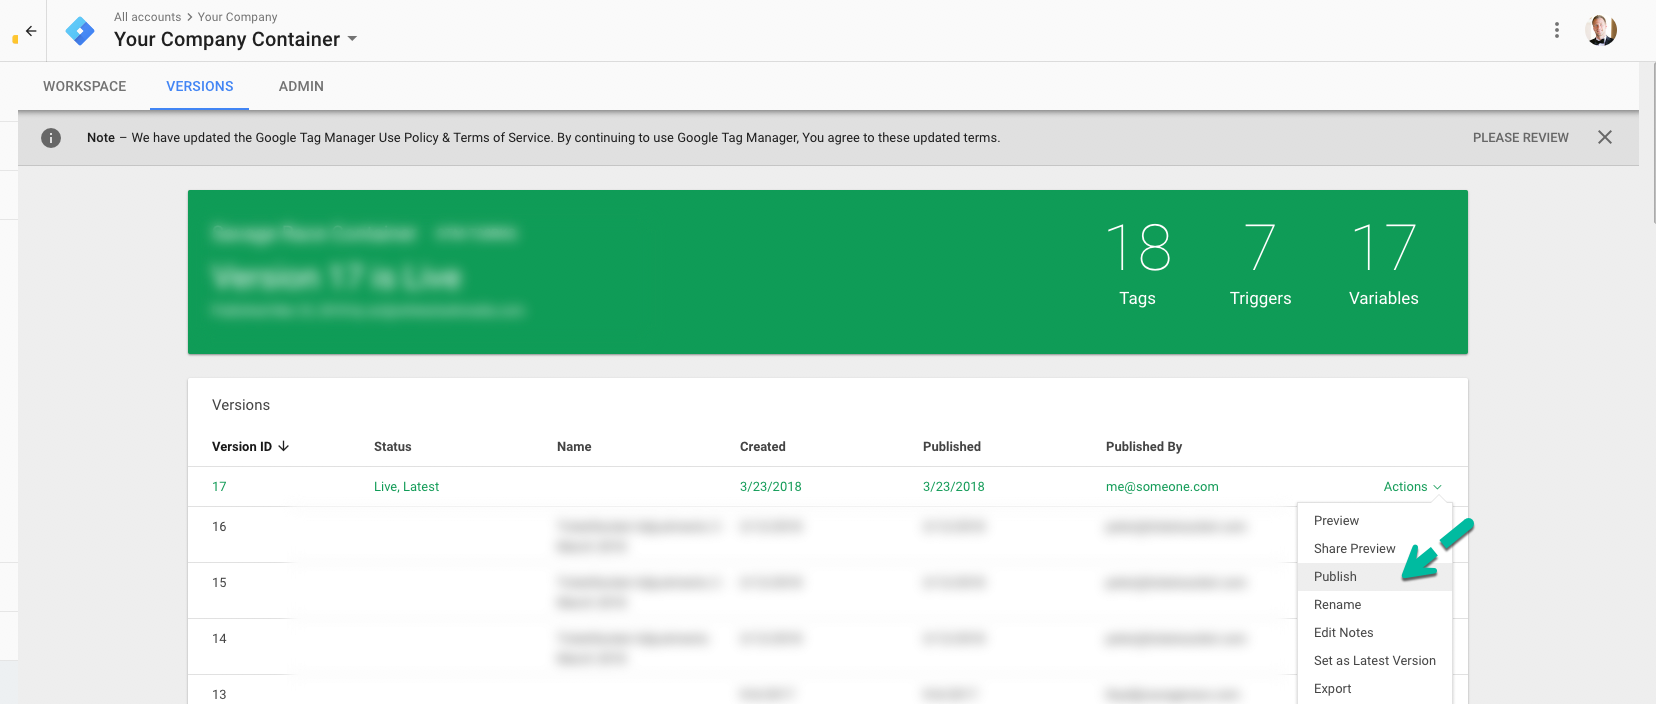
Step 4: Submit and Publish your Tags
Now that you have your Tags, Triggers and Variables, you must submit the Google Conversion Tag and Publish the Container: Click “Submit” in top right corner.

Then click the “VERSIONS” tab and the “Publish” action to publish your version.
Step 5: Add your Embed code tags to your TicketSocket Analytics pages
Now that you have configured your Google Tag Manager, Analytics and AdWords settings and tags it’s time to add your embed code to your TicketSocket page.
To do this simply go to your TicketSocket Admin page such as https://secure.yourcompany.com/admin and click on Settings / Site / Analytics.
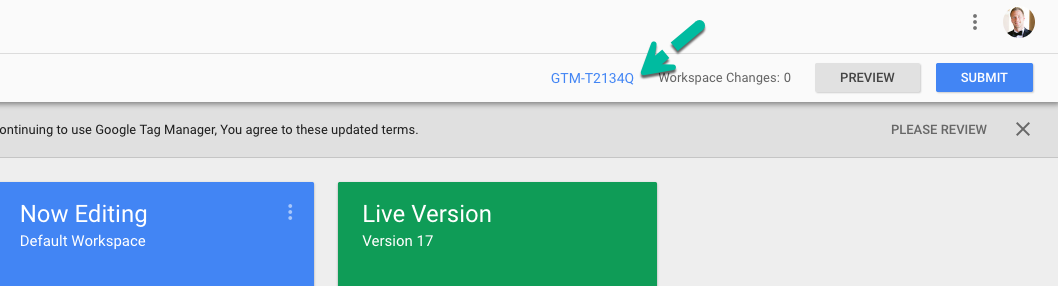
IMPORTANT: Change TXXXX in the analytics code to your Google Tag Manager Container ID found in Google Tag Manager in the top header:
Next simply add the code below with your new Google Tag Manager Container ID.
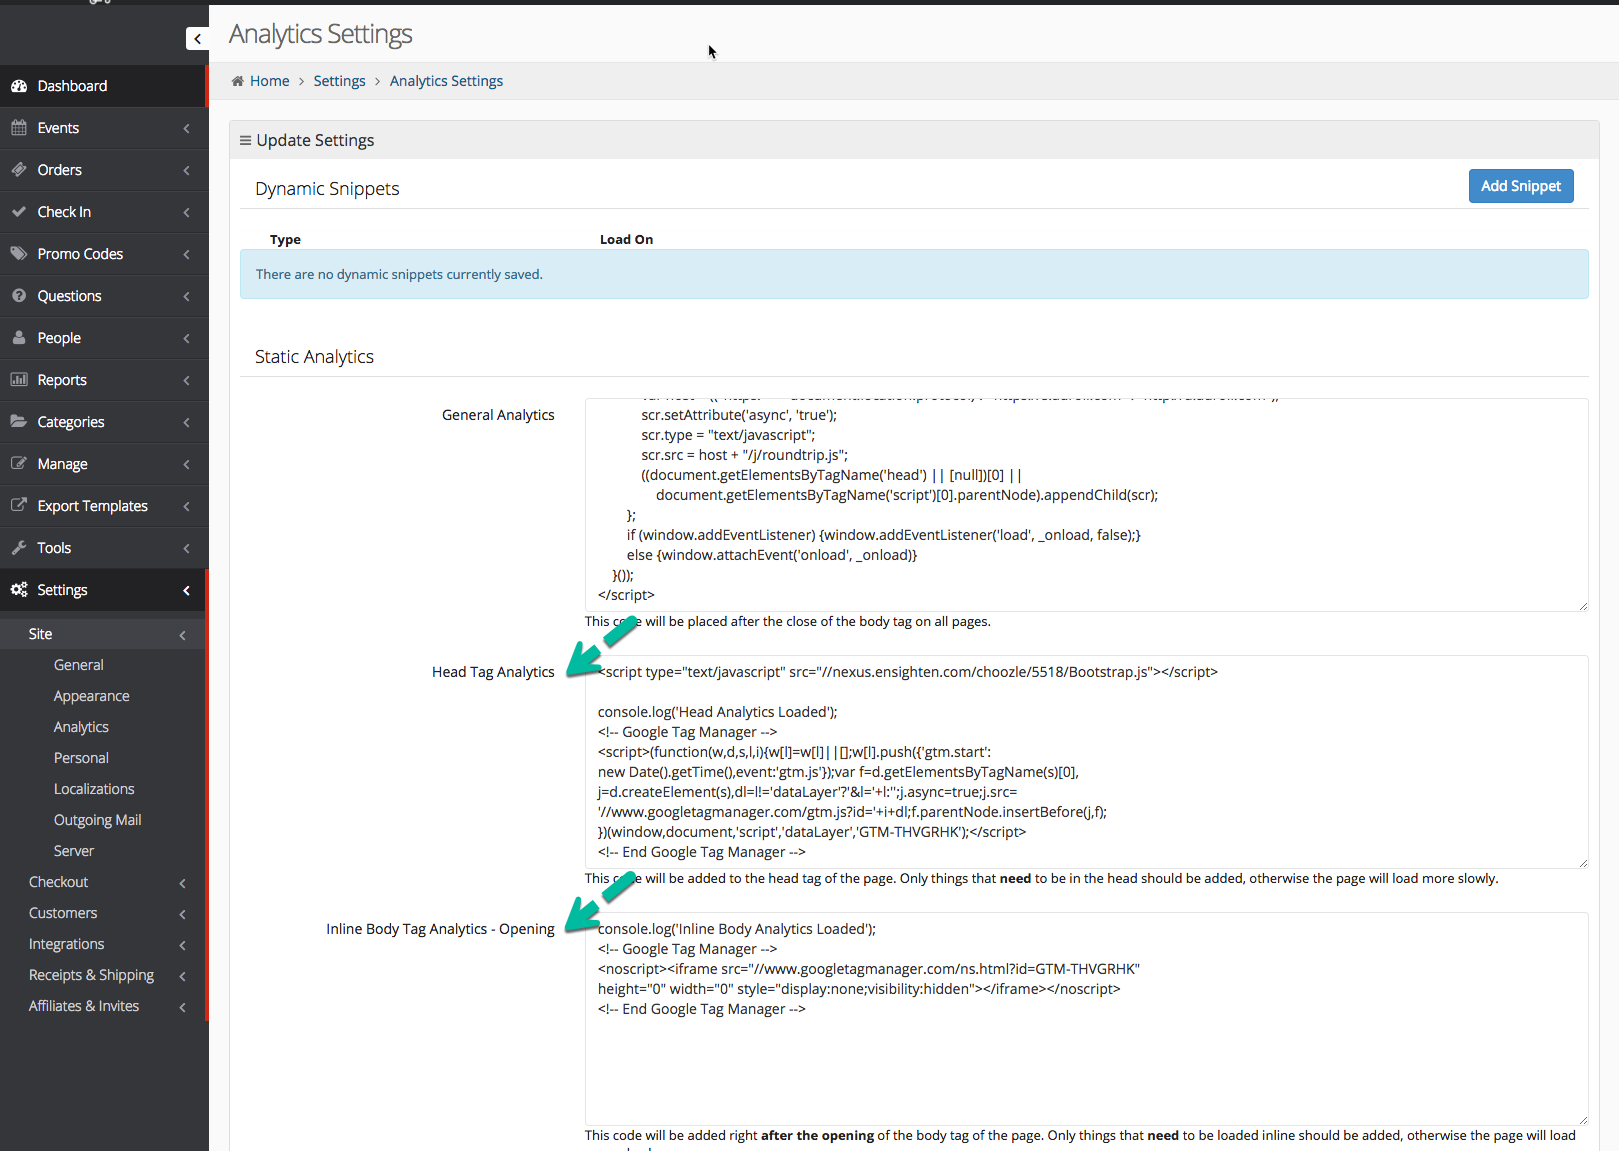
Head Tag Analytics:
console.log('Head Analytics Loaded');
<!-- Google Tag Manager -->
<script>(function(w,d,s,l,i){w[l]=w[l]||[];w[l].push({'gtm.start':
new Date().getTime(),event:'gtm.js'});var f=d.getElementsByTagName(s)[0],
j=d.createElement(s),dl=l!='dataLayer'?'&l='+l:'';j.async=true;j.src=
'//www.googletagmanager.com/gtm.js?id='+i+dl;f.parentNode.insertBefore(j,f);
})(window,document,'script','dataLayer','GTM-TXXXXX');</script>
<!-- End Google Tag Manager -->
Inline Body Tag Analytics - Opening:
console.log('Inline Body Analytics Loaded');
<!-- Google Tag Manager -->
<noscript><iframe src="//www.googletagmanager.com/ns.html?id=GTM-TXXXXX"
height="0" width="0" style="display:none;visibility:hidden"></iframe></noscript>
<!-- End Google Tag Manager -->
Confirmation Analytics:
console.log('Confirmation Analytics Loaded');<!-- Google Code for Purchase Conversion Page -->